Showing posts with label tips and recipes. Show all posts

Thursday, May 19, 2011

{Almond Chicken}


Don't forget everything at Chicy Creations is 45% off through the end of the weekend. There are some insanely awesome deals to be found in the shop right now!

*****
One of the Win, Lose or Blog contestants, Bailey, posted this kraft recipe for Almond Chicken Dijon a few weeks ago and I love it!


The original recipe calculates at 200 calories, I made a few minor adjustment to add one of those super food boosts, without adding extra calories.

Here's how I make mine:

1 lb boneless skinless chicken breast
2 tablespoons light mayo with olive oil
2 tablespoons spicy brown mustard
4 teaspoons ground flax seed
4 teaspoons chopped almonds

Heat oven to 375. Mix mayo, mustard and flax in a small bowl, evenly divide and spread over chicken breast. Sprinkle each chicken breast with one tablespoon of chopped almonds. Bake for 20-25 minutes.

This is SO easy and so tasty.

One chicken breast works out to be 200 calories with 26g protein! Serve this up with some veggies and a side salad and you have a low fat, low cal, filling dinner packed with protein. I've made this several times now and we all love it! You can cut out a few calories by leaving out the flax seed, but I've been trying to sneak some in our diet here and there and I think it's worth it.

It's the last week of the Win, Lose, or Blog competition! These last 7 weeks have flown by. I've lost 20 lbs so far and I'm loving the new energy I have and the lifestyle changes I've made. Feel free to check in at Win, Lose, or Blog next week to see the final results!

Tuesday, March 15, 2011

{Cafe Rio Creamy Tomatillo Dressing}

Super Low Entries on the Necklace or $15 credit to Chicy Creations Giveaway- End 3/31
Easy Entries!
*****

I've posted the Cafe Rio Creamy Tomatillo Dressing copy cat recipe once before, but I made a couple minor adjustments last night and I think it made a huge difference.

Café Rio Creamy Tomatillo Ranch Dressing

1 bottle fat free ranch dressing (I make mine from a Hidden Valley Ranch packet)
3 tomatillos chopped**
½ bunch of cilantro
1 clove garlic- minced
Juice of 1 lime
1 small jalapeño (remove the seeds)

Blend everything together in a food processor or blender.
The last recipe only called for 2 tomatillos, I used good size tomatillos and thought the flavor was much better this time. I also used less jalapeno this time, last time I used too much and it was a bit on the spicy side. This dressing isn't supposed to be really spicy, of course of you like spicy, by all means, spice away, but I used about a heaping tablespoon full of chopped jalapeno and it worked out perfect.

**Tomatillos can be found by the peppers in the produce section. See above picture. REMOVE the husk before using it.

Other Cafe Rio Recipes can be found HERE.

I made the rice, chicken and dressing last night. Delish.

Tuesday, March 1, 2011

Mexican Lasagna

March already?!

Here's an easy recipe.
Mexican Lasagna.

Let me tell you, don't judge a dish by it's recipe...or looks.

When my husband saw what I was putting in it, he gave me this weird look. I responded with a smile and "I hope your hungry!"  He said "uh...yeah...me too."

When my 3 year old saw me put it on the table, she said "Oh, it's beautiful mommy!"

Really?...looks wise..that's a negative.

A little better dished up...


Looks aren't everything, this was one easy, tasty dinner.

Mexican Lasagna:

1 lb ground beef or turkey
3 or 4 tortillas
1 can cream mushroom soup
1 can corn
1/4 cup diced onion
1 15 oz can refried beans
2-3 cups of shredded mexican blend cheese
1/4 cup sour cream
Taco Seasoning
Toppings *optional

Preheat oven to 350.

Brown and drain ground beef or turkey and onion in large skillet. Add corn, beans, soup and mix well. In a small bowl, mix sour cream and taco seasoning. I added maybe 2-3 tablespoons. Add sour cream mixture to meat mixture and heat thoroughly.

Here comes the lasagna part, add a small amount of meat mixture to the bottom of a 13x9 baking dish. cut tortillas in quarters and fit to fill pan. Add more meat mixture, sprinkle with cheese, add another layer of tortillas, top with the remaining meat mixture and cheese.

Bake 30 minutes.

Top with lettuce, salsa, sour cream, black olives or whatever you please!


Hubby was super nervous when he saw that can of cream of mushroom (and I have to admit I was a bit too!), but we both really liked it. My 3 year old can be super picky when it comes to casseroles/lasagna... she likes to see each thing she is eating, but she loved this and even asked for leftovers the next day for lunch.
And now for confession time...some nights our dining room table looks like this:


It's something I'm working on...keeping the dining room table for just dining at as my husband would say. It might help if I got the craft room under control.

Happy 1st Day of March!

Monday, February 28, 2011

Whole Wheat BBQ Chicken Pizza

The other night I attempted Round 3 of homemade pizza dough, which was Round 1 of whole wheat pizza.


The first two attempts at pizza were major fails, this time..success!

I used a recipe I found on Food Network for the dough:


Whole Wheat Pizza Dough

Ingredients:


1 package dry yeast
1 1/4 cups lukewarm water
1 1/2 cups whole wheat flour
2 cups all-purpose flour
1 tablespoon olive oil
1 tablespoon honey
1/2 teaspoon salt

Directions

Proof yeast in a measuring cup with lukewarm water.
{I just let it sit for a few minutes while I measured everything else}
In a food processor add whole wheat and all purpose flours, proofed yeast, oil mixed with honey and salt. Pulse processor to combine all ingredients. Then process until the dough forms a ball on the blade. Remove dough to a large oiled bowl. Cover with plastic wrap or a kitchen towel and let rise in a warm place for 45 minutes or until dough has doubled in bulk.

Punch down dough and transfer to a floured board and knead briefly. Divide dough into 4 equal portions and roll each piece into a ball. Place the balls of dough, covered, in the refrigerator for at least 2 hours or overnight. Bring the dough to room temperature before proceeding.
On a floured board roll and stretch each piece of dough into a 7 to 8-inch circle. Place each circle on a wooden pizza peel or pizza pan and top as desired.
Preheat oven to 450 degrees F. and bake 7 to 8 minutes per pizza.
****

I added some garlic salt, italian seasoning and crushed red pepper to the dough when I was making it.
I also only formed it into two pizzas.

I used to work at Papa Johns, so I happen to have mad pizza slapping skills ☺ {you stretch it by slapping the dough back and forth between your arms}. I recommend a flour/cornmeal blend when rolling/stretching out your dough.

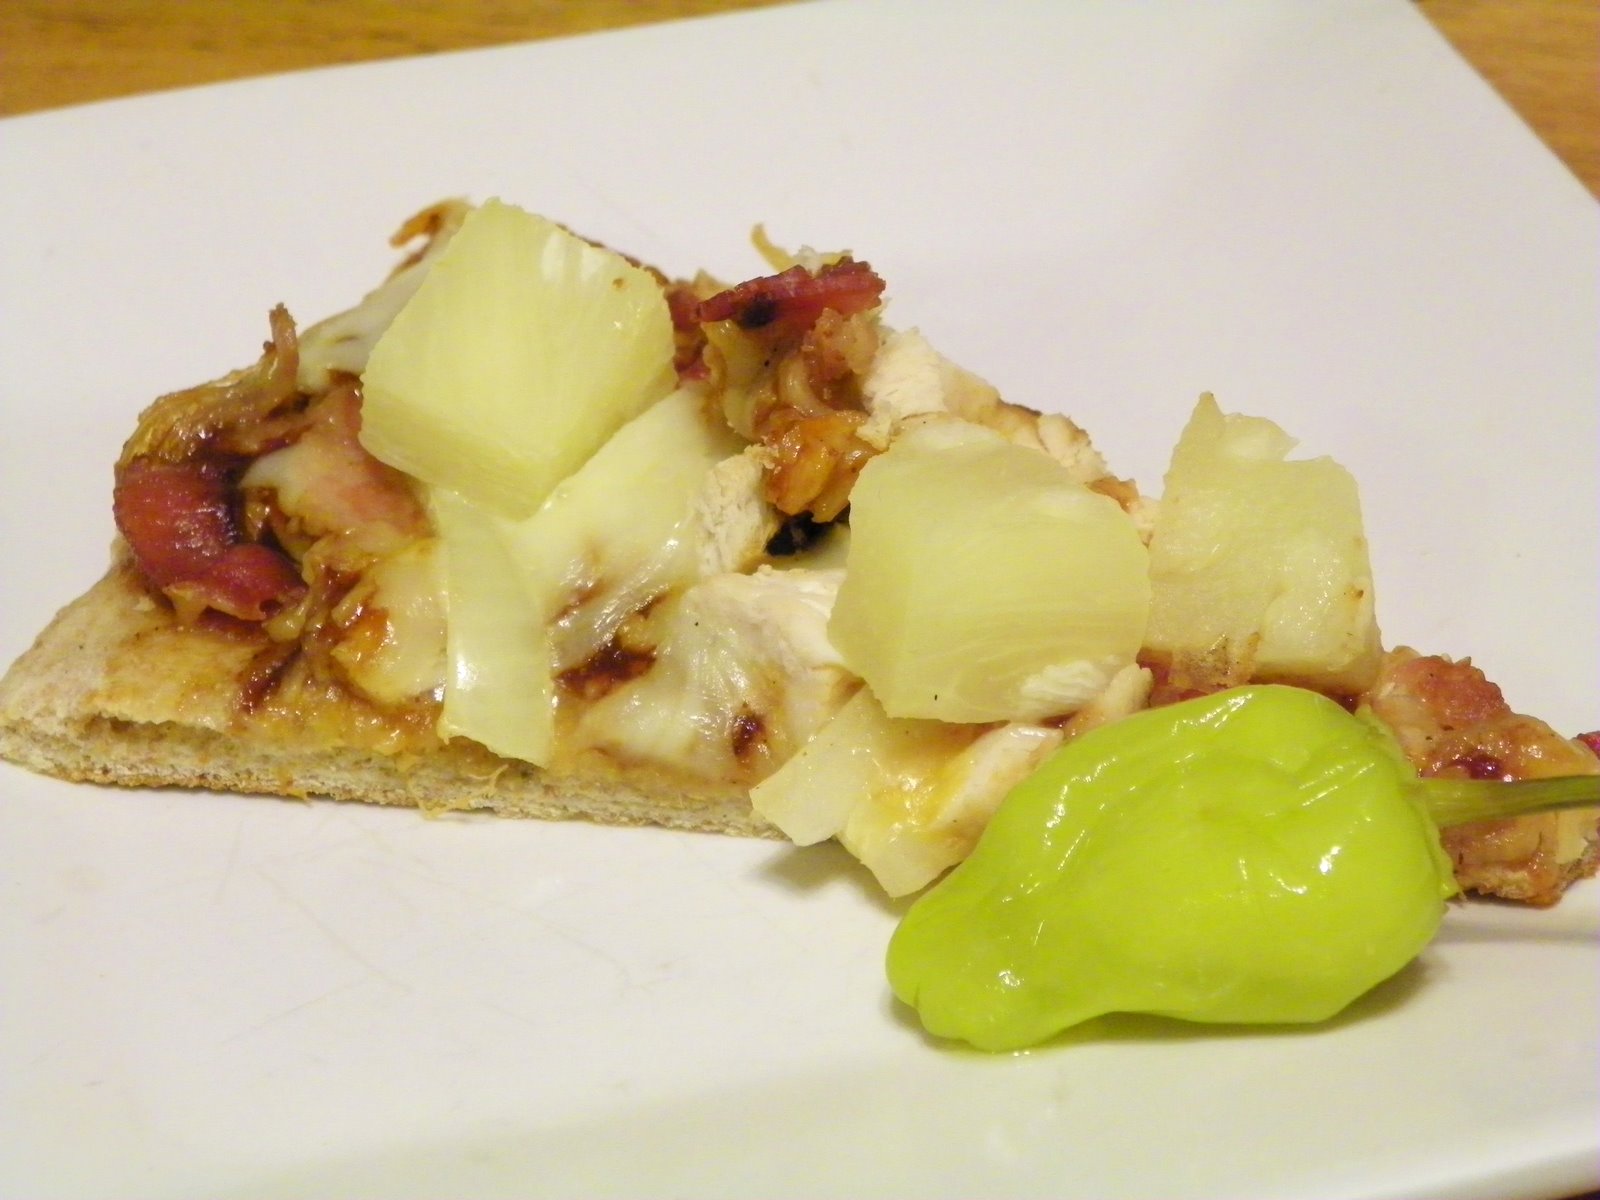
We topped one like a supreme, but our favorite by far was the BBQ Chicken pizza:

Top with your favorite bbq sauce {we used hunts hickory}, pizza blend cheese, onion, chopped cooked bacon, pineapple, and chopped grilled chicken.

I also added sliced pepperchinis to one side for an extra kick.

Yum!

The crust was thin, but soft and chewy. I LOVE bbq sauce on pizza.

Don't forget to enter for a free necklace or $15 credit to Chicy Creations HERE.

Linking up to:


Check out other great linky parties on the right--->


Tuesday, November 23, 2010

Layered Strawberry Gelatin Cheesecake


{Don't forget to enter the CSNstores.com giveaway! It ends tonight at midnight!}

I've had strawberry pretzel jello salad at several of my hubby's family functions and yum, I love it.
I've never made it myself before, but decided to give it a try in a pie version for Sunday night.

It reminds me a little of strawberry cheesecake...


Want to give it a try? Here's how I made it...
Layered Strawberry Gelatin Cheesecake

For the whole pie you need:
1- ready made graham cracker crust pie shell
4 oz cream cheese
8 oz cool whip topping, divided
1/2 sugar
3 oz strawberry gelatin pack
1 cup water
2 cups frozen strawberries

{Cheesecake layer}

4 oz cream cheese
4 oz cool whip topping, divided
1/2 c white sugar

Cream together cream cheese, 4 oz of cool whip and sugar, fill pie shell half way with mixture. Smooth up evenly along all sides of shell to cover all of the shell. Cover and Chill in freezer for 10-15 minutes until firm.

{Strawberry Gelatin Layer}

3 oz pack of strawberry gelatin
1 cup boiling water
1 1/2- 2 cups of frozen strawberries

Directions: Dissolve gelatin in boiling water. Add frozen strawberries and stir until thawed. I used whole strawberries, so after this step I put it all in the blender and hit the chop button for a few seconds. Let cool for a few minutes.

Once your cream cheese filled pie shell is chilled, fill the rest of the pie with your gelatin mixture. Cover and *carefully* transfer to fridge to let set over night. Top with your remaining cool whip before serving and garnish with strawberries {optional}. I used thawed frozen strawberries to garnish the top and they worked just fine!

Eat. Enjoy.


Monday, November 22, 2010

{Pumpkin Cupcakes with Whipped Cream Cheese Frosting}


{Have you entered the CSNstores.com $55 gift code giveaway? No? Click HERE!}
I got my camera just in time to show you some goodies I made for a little pre-Thanksgiving turkey dinner we had with some friends yesterday. I was expecting my camera on Saturday. fail. I got it this morning though and luckily I had just enough leftover treats to play test my new camera on today.
 
I've said before that I am not a food photographer...
or any photographer really, but I'm especially no bueno at food pictures.

This is the first time I've made these cupcakes and I thought they were pretty darn tasty.
{love pumpkin}

Here's the recipes I used:

Pumpkin Cupcakes:
{Makes 12 cupcakes}2 eggs
1/4 cup + 2 tablespoons of vegetable oil
1 cup sugar
1 cup canned pumpkin
3/4 cup + 2 tablespoons all-purpose flour
2 tablespoons corn starch
2 teaspoons pumpkin spice
1 teaspoon baking powder
1/2 teaspoon baking soda
1/4 teaspoon salt

Directions: Preheat oven to 350 degrees. Beat eggs, sugar, pumpkin and oil. Mix dry ingredients in a seperate bowl, then add to wet. Line cupcake pan with liners, fill each liner about 3/4 full with batter. Bake for 20 minutes. Let cool before frosting.

Whipped Cream Cheese Frosting:
8 oz room temp cream cheese*
3/4 c powdered sugar
8 oz cool whip

Directions: Cream sugar and cream cheese together. Fold in cool whip. Refrigerate 1-2 hours before using. Lightly mix frosting before using.
***
*Make sure you cream cheese is completely room temp. I set mine out in the morning and made the frosting in the afternoon. I've heard some leaving it out over night. It won't cream well if its chilled at all.
I frosted the cupcakes pretty generously and still had plenty of frosting left, you might be able to frost 24 cupcakes with this amount of frosting depending on how much frosting you like!

Hubby really liked these cupcakes and he is pretty picky when it comes to cake/cupcakes.
{Perfect taste of fall}

I also made a Layered Strawberry Gelatin Cheesecake. Mmm.
Check back for that recipe tomorrow!

Thursday, October 7, 2010

What's Cookin' Good Lookin'?


I'm so glad you asked! {har har}

First of all, you might have noticed I'm working on adding categories up there ↑ You'll find tonight's recipe and others under the "recipes" tab.

*On to our regularly scheduled program...*
Tonight's menu:

Chicken Burrito Bowls
{rice}
{black beans}
{chicken}
{cheese}
{shredded lettuce}
{diced tomatoes}
{salsa}
{sour cream}
{crushed corn chips}

and...

Horchata!

Let me tell you, I love a good cold glass of Horchata. Yum Yum. We went out to eat this last week and we treated ourselves to a glass...or two. I've been craving more ever since.

I searched my favorite recipe website and found this recipe:

Lola's Horchata

Ingredients:

1 cup uncooked white long-grain rice
5 cups water
1/2 cup milk
1/2 tablespoon vanilla extract
1/2 tablespoon ground cinnamon
2/3 cup white sugar

Directions:

1.Pour the rice and water into the bowl of a blender; blend until the rice just begins to break up, about 1 minute. Let rice and water stand at room temperature for a minimum of 3 hours. {I did 5 hours} 
2.Strain the rice water into a pitcher and discard the rice. Stir the milk, vanilla, cinnamon, and sugar into the rice water. Chill and stir before serving over ice.

*Mine tasted a little more watery than I like, so I added about an extra half cup of milk and it was delish! My only complaint was that there was a lot of cinnamon on that floated to top and sat on the bottom. Not a huge deal, I just shook my cup lightly before each drink. Next time I might try soaking cinnamon sticks in with the rice, or adding the cinnamon powder in with the rice while it soaks and strain it all together.

I believe the hubster said {at least} two or three times that dinner was "so good". Simple. But Good. The chicken was just leftover crock pot chicken from a couple nights ago that I tossed back in the crock pot this afternoon with a little water and taco seasoning.

Wednesday, September 22, 2010

Nothing taste as good as being skinny...

...except Chocolate Chip Oatmeal Peanut Butter Cookies...


These things are the best of three worlds cookies!

Chocolate Chip Oatmeal Peanut Butter Cookies

Ingredients

1/2 cup shortening
1/2 cup margarine, softened
1 cup packed brown sugar
3/4 cup white sugar
1 cup peanut butter
2 eggs
1 1/2 cups all-purpose flour
2 teaspoons baking soda
1 teaspoon salt
1 cup quick-cooking oats
1/2 bag of chocolate chips *optional*

1.Preheat oven to 350 degrees F (175 degrees C).


2.In a large bowl, cream together shortening, margarine, sugars, and peanut butter until smooth. Beat in the eggs one at a time until well blended. Combine the flour, baking soda, and salt in a separate bowl; slowly add flour mixture to cream mixture. Mix in oats and chocolate chips until just combined. Drop rounded teaspoonfuls onto ungreased cookie sheets.

3.Bake for 9-10 minutes or until just light brown.
 
Cool.
Eat.
Enjoy.
 
I love these cookies.
Maybe a little too much, I've already bagged half of them and need to give them away fast!
 
*Just a note, the original recipe said it yields 4 dozen cookies, but I always end up with more like 5-6 dozen cookies...with or without the chocolate chips.

Friday, August 27, 2010

Banana Chocolate Chip Bars


I love searching the web for recipes, normally allrecipes.com is my go to site, but they failed me today. Fortunately, I was able to find a banana chocolate chip bar recipe while searching swagbucks.

I found the recipe on a dinner co-op site. Let me tell you, the recipe did not disappoint!

They came out perfectly golden and were more cake-like than a cookie bar. Yum. No frosting needed on these bad boys.

Want to make your own? Here's the recipe I used...

Banana Chocolate Chip Bars


2 cups flour
2 teaspoon baking powder
1/2 teaspoon salt
2/3 cup shortening
2/3 cup sugar
2/3 cup brown sugar, packed
1 teaspoon vanilla
1 egg
1 cup mashed ripe bananas (about 2 medium)
1 cup semi-sweet chocolate chips
Stir flour, baking powder, and salt together. In a large bowl cream together shortening and sugars until light and fluffy. Beat in vanilla and egg. Blend in banana, then flour mixture. Stir in chocolate chips. Spread evenly in a greased and floured 10 1/2 x 15 1/2 pan. Bake at 350oF 20-25 minutes until golden brown. Cool 15 minutes and cut into bars.

I realized I didn't have any vanilla while I was making these, and they still came out delish.

Enjoy!

Thursday, August 19, 2010

Nutty Caramel Cocoa Krispy Treats

Last week I spotted some caramel vanilla marshmallows at the grocery store by the check out and knew I had to try making rice krispy treats with them. {Despite the fact that I know I have about 50 lbs to lose!}

I didn't have regular rice krispies at home, but I did have cocoa krispies.

And what makes chocolate even better? Chocolate with peanut butter.

I'm sure I'm not the first to make these, or the last, but boy they are good!

Nutty Caramel Cocoa Krispy Treats
(Lame title? I couldn't decide what they should be called) 
They taste better than they look!


{What You Need}

6 cups of Cocoa Krispies or Cocoa Pebbles
3 T butter
1/2 c peanut butter
10 oz bag of Caramel & Vanilla Marshmallows

Melt butter and peanut butter in a large pot on low heat

Add Marshmallows...

Stir until all melted, creamy and gooey. Yum....

Mix in cereal

Stir until all cereal is coated in gooey yumminess

Press mixture in a greased 13x9 pan.
*lightly grease your hands to make pressing easy

Cool
Cut
Enjoy

Friday, August 13, 2010

Mega Swag Bucks Friday & Easiest Cake Cookies EVER!

Just a quick note about Swag Bucks, today is Mega Swag Bucks Day.
Every Friday you have the chance to earn "mega" swag bucks. Don't let Friday the 13th discourage you, with some luck you can earn big swag buck "bills" starting at 20 and up today. I just earned 31 for one search!

*Happy Dance!*


Search & Win

The code SwagToSchool is still valid until tonight at 11:59 pm PDT when you sign up.
Go earn yourself some swag bucks!

**On to good stuff!**


Funfetti Cake Cookies


Do you have a cake mix, 1/3 cup of oil, and a couple eggs?
You're all set to make some cookies!
Well, plus you need a bowl, spoon, cookie sheet, oven and some oven mits would be helpful too :)

Heat oven to 375°F.

In large bowl, combine cake mix, oil and eggs; stir with spoon until thoroughly moistened.

Shape dough into 1-inch balls; place 2 inches apart on ungreased cookie sheets.
With bottom of glass dipped in flour, flatten to 1/4-inch thickness.

Bake at 375°F for 6 to 8 minutes or until edges are light golden brown.
Cool 1 minute; remove from cookie sheets.
Eat and enjoy a little piece of Heaven!

This basic recipe works with any cake mix.
My favorite is a yellow cake mix with chocolate chips mixed in.
We had a funfetti cake mix in the pantry, so that's what I used and my hubby loves them.

The original "funfetti cake cookie" recipe called for funfetti frosting on top, I thought it was sweet enough without the frosting so I skipped the frosting. Yum!

What's your favorite Cake Cookie Concoction?

Sunday, June 13, 2010

Super Mom!

Ok, I might not be a super hero, but I feel pretty dang proud of this weekend's laundry accomplishment!

My 2 year old recently discovered the amazing capability her pockets have of holding junk. As I type this, I hear her saying "Oooo...pocket!" as she shoves yet another trinket in her short pocket which I will have to later remove on laundry day.

On to my weekend laundry endeavors (you can probably guess where this is going). My wonderful husband decided to do laundry this weekend. So sweet. He washed and dried two loads. I took the job of folding the clean clothes...at least I intended to fold them. To my horror there was blue, green and red crayon on EVERY. SINGLE. ITEM. Dried on crayon meets the top 10 of every mom's worst nightmares list. My clothes and the kids clothes were ruined. Are you kidding me? Now that I think about it, not a single piece of the hubby's clothes were in the wash. I tried not to be peeved with my helpful hubby, but he had only creating more work and a possible clothes shopping trip that I was surprisingly not happy about.

I didn't have a ton of hope I would be able to salvage the clothes, but I ran to the store to pick up some Oxiclean Stain Remover, refill size...I had a lot of stains to remove!


And some stain catcher sheets...


I filled the tub (I had two large loads and wanted to soak both at once) with HOT HOT HOT water. I poured in a good amount of Oxiclean, laundry soap, color safe bleach and a color catcher sheet. There were a lot of new-ish items I didn't want bleeding on to the others during the soak. I let them sit all night and when I woke up, I found the tub had drained, so I refilled it with more HOT water, and started the process over again and let them soak all day. I still didn't have much hope when I transferred the loads into the wash, all the crayon still appeared to be on the clothes. This is where the super mom part comes in (ok, maybe just super cleaner..thank you oxiclean!), I went from 2 full loads of stained laundry to 5 single pieces of clothing with just a little crayon left on them! I will be re-treating those and scrubbing them with a toothbrush and will hopefully remove the rest! PS, a tooth brush is a must have for stain removal...I use it often with the mess my kiddo manages to make on her clothes.

If you ever run into a crayon tragedy, all hope is not lost! Oh, and before you dry anything else in the dryer, start it (empty), let it heat up and wipe it out immediately after with a dry cloth. You don't want any crayon left on the drum transferring to more clothes!

Happy Washing!

Wednesday, March 24, 2010

Bountiful Baskets


(Image from Here)


If you live in Utah, Arizona, Nevada, Idaho or Washington and love fresh produce, this post is for you!


When we lived in Arizona we participated in Bountiful Baskets. After living in Utah for 1.5 years, we finally signed up here and once again, we weren't disappointed.


Bountiful Baskets is a produce co-op found throughout the above mentioned states. Basically you get a boat load (ok, only a basket load) of high quality produce for super cheap. This is the same produce usually reserved for restaurants and grocery stores, but since the work is all done by volunteers within the co-op, it is available for only $15.00 for a conventional basket (some locations offer organic baskets). Each week is different, so you never know what kind of produce you will get, but it gives you the chance to try new things.

I wish I had taken a picture, but didn't think to..to give you an idea of how much produce you can expect, this last week $15 got us:


1 bunch of bananas
3 lbs of apples
2 bunches of celery
2 bunches of asparagus
2 heads of green leaf lettuce
1 head of cabbage
8 kiwis
2 small bags of radishes
4 cucumbers
1 lb of strawberries
1 carton of blueberries
1 acorn squash


Since there are just 2 adults, a toddler, and a newborn in our family we decided to split the basket with some friends of ours. We found we do eat a lot of produce and could probably do a whole basket ourselves, but won't sign up weekly, probably only twice a month.


Bountiful Baskets also does bread and occasionally specials offerings such as produce by the case, ethnic produce packs, pantry items, desserts and other specialty breads.

If you want more information, take a look HERE.


Happy Wednesday!

Monday, December 21, 2009

Chocolate Covered Peanut Butter Sandwich Cookies


Need a quick last minute treat to make for the holidays? It doesn't get much easier than this!

Chocolate Covered Peanut Butter Sandwich Cookies

1 Box of Ritz Crackers
1 Package of Almond Bark
1 Jar of Peanut Butter

Yields approximately 70 cookies

*Other supplies: wax paper/aluminum paper, medium microwave safe bowl, knife and fork

Spread peanut butter between to Ritz crackers, set aside.. repeat 69 times (or less if you have my luck and always have at least 4 crackers broken in the package).

Melt almond bark according to package. Dip each Ritz sandwich in the melted chocolate*, place on wax paper or aluminum foil and let dry. Store cookies in an air tight container and eat. Yum! If you have ever had Tagalong Girl Scout Cookies, these taste somewhat similar. I have *heard* that these can store well for up to 2 weeks, these never last that long around here!

*If you have never used dipping chocolate before, I find it easiest to place the sandwich in the melted chocolate, lightly press down with fork until its half covered, flip and then lift it out with the fork, I lightly tap the fork (handle) on the edge of the bowl and let some of the excess chocolate drip off. Make sure all sides are covered before pulling it out and placing it on your wax paper.

A regular size box of Ritz crackers has about 140 crackers, which will give you 70 sandwiches...most of the time I have a few (or a lot!) of broken crackers. You *should* be able to use one full pack of almond bark to dip 70 cookies. If you go a little heavy on the dipping you might end up with a little less. I ended up using about half a jar of peanut butter to make these.

I waited too long to buy white chocolate this year and the stores are out around here, but I normally make some white chocolate ones with either crushed candy cane sprinkled on top and milk chocolate drizzled on top...and then some with the opposite (milk chocolate with white chocolate drizzled). You could use red and green sprinkles too...or just plain chocolate dipped are perfect!

Another easy dipping treat is white chocolate covered Oreos! Mmm Mmm...

Enjoy!

Happy Holidays

Monday, July 20, 2009

Target Baby!

Remember this post about the target clearance guide and this post about the cute summer baby apparel?? Today I went to pick up some OTC meds to try in hopes to ease up this darn morning sickness. While I was there, I had to check the kids clearance! Boy am I glad I did!

I fell in love with those shorts I posted about back in April and wanted to buy them for Payton, but let's be honest... I'm cheap! They were $9.99 and I just can't bring myself to spend $10 on a pair of shorts that she'll wear one summer and grow out of or destroy. I've oogled over them the last few months... then they started clearancing them out, but I'm still so cheap I wanted to see just how low they'd go. I'm proud to report they had one pair left today in her size, marked down to only $2.48! Woo Hoo! That's more like it!

I also nabbed a pair of white shorts for $1.50 and a pair of pink bermuda shorts for her for only $1.98. All have adjustable waistbands which are almost a must with my daughter!

Have I told you how much I love target clearance?? Payton grows too fast for me to be able to spend much on her wardrobe, so I rely on Target clearance and this great consignment shop called Kid to Kid. They have locations in 19 or 20 states I believe?? I've always had great luck finding nice gently used clothes for Payton there, and have sold a few of her clothes/toys there as well for cash/store credit. The stores I've seen have always been so clean and organized, nothing personal against Savers or Goodwill or other thrift stores, but I've been to a few of them (in Arizona) that made me feel like I needed to go home and take a shower afterwards. You can sign up for Kid to Kid's email club and they'll notify you when they are having sales or specials and you get a frequent shopper punch card. Twice a year they do a clearance sale, and once a year they do a "$7.00 bag sale" where you get to stuff a bag full of items and pay only $7.00 for whatever you can fit. A friend of mine and I did that this year and she fit 30 something items in her bag if I remember right. If you have little ones, it'd be worth checking out if there's a Kid to Kid near you! Sorry if that sounds like a total sales pitch, I'm not affiliated with Kid to Kid, nor are they paying me to praise them on my blog, I just love the store! :)

Wednesday, July 15, 2009

New News and Some Dang Good Brownies

Some of my loyal readers have probably noticed there hasn't been much to read in the last few weeks...or many new items in my shop...and twitter...what's that these days? I've had some fellow twitters point out my lack of tweets...and all I've said is I have a good reason, promise! So maybe its time to be real here and explain! We are expecting baby #2. I've had morning sickness since approximately week 3, before I could even test positive (I'm lucky like that!). Last week I started experiencing some pain, I went to the doctor, had an ultrasound and found out I have a 2 in ovarian cyst. Saturday I found out my progesterone level is low (barely within the normal limit) and was put on pills. Common side effects include bloating, nausea, cramps, heartburn, headache, irritability, fatigue, vomiting...you get the picture. All that + me = real treat! SO blogging and twitter has been put on the back burner (as well as the house work and cooking) and the couch is currently my best bud. Really, I'm not trying to complain, if all this results in a healthy baby, then I'll take it! Hopefully the morning sickness lets up soon (I had it everyday with my first pregnancy until I gave birth) until then, there might not be as many posts and tweets out of me!

Onto the Dang Good Brownies! The recipe is originally from here. I took some suggestions from the reviews and made some adjustments.

Ingredients

2 cups white sugar
1 cup butter or margarine
1/2 cup cocoa powder
1 teaspoon vanilla extract
4 eggs
1 cup all-purpose flour
1/2 teaspoon baking powder
1/2 teaspoon salt

Directions

1. Melt the butter or margarine and mix all ingredients in the order given.
2. Bake at 350 degrees F for 20 to 30 minutes in a 9 x 13 inch greased pan.

Mmmm! Super easy recipe!

Happy Wednesday!

Thursday, May 21, 2009

Zesty Southwest Black Bean and Corn Pasta Salad

Warning: Incredibly Easy Recipe!!

Some friends invited us over for burgers last night and I said I'd bring a pasta salad. If you like black beans, corn, and chiles, you'll love this!

Here's what you need:

12 oz pack of spiral noodles
15 oz can of corn -drained
15 oz can of black beans- drained and rinsed*
15 oz can of Zesty Mild Green Chile tomatoes (or similar) drained well
8 oz bottle of Italian dressing
1/4 c. Parmesan cheese (optional)

*Make sure you rinse well, you don't want any liquid from the black beans in your pasta.


Cook pasta according to package. Drain. Mix all ingredients.

Chill (I did overnight). Eat.


After I uploading these pictures I realized Payton had got ahold of my camera and put a nice little thumb print on the lens and I forgot to clean it off. Stinker!

Can you tell I love easy recipes?? I love making pasta salad and rarely make the same version twice. Sometimes I do a mix of cubed cheese, broccoli, olives, and green chiles instead. Most of the time I just toss in what I have in my pantry or fridge that will go well together. This version is one worth making again! I'm terrible at knowing how many servings this will make...but it makes a lot! If served as a side, I'd say it'd easily serve 10-12. You could throw in some chicken and serve it as a main dish and probably serve 6-8. There was 4 and two kiddos and we have plenty of left overs!

Enjoy!

Wednesday, May 20, 2009

Crockpot Chicken Fajitas

Yesterday morning I knew I wasn't going to feel like cooking dinner that night. It didn't help that hubby has been trying to keep us from using the ac until June. It was hot and there was no way I was going to stand in front of the stove at all that day. **Side note: Hubby came home from work and realized just how hot it is in our house, his June plan didn't work out!**

I decided it was a crockpot kind of day! I wanted something easy, that and along with my laziness I didn't want to go to the store. I looked in my fridge and pantry and this is what I came up with.

Chicken Fajitas

2 lbs thawed and sliced chicken
1 Bell Pepper -julienned
1 small onion- thinly sliced
1/3 c chicken broth
2-3 tablespoons of McCormick Taco Seasoning*

*I used this because I didn't have a fajita packet on hand, if you have one, you could use that, or a couple teaspoons of cumin, chili powder, and onion powder would work well too! (Those are key ingredients in taco and fajita seasoning packets.

Here's my favorite part! Throw it all in the crockpot, set on low and cook 5-6 hours.


When you're ready for dinner, spoon some in a flour tortilla, add cheese, salsa, and sourcream or your favorite toppings. No heating up the kitchen and dinner is ready when you are!

The picture is not the prettiest, but it sure did taste good. I wrote the recipe for double of what I actually made. There's just me, hubby, and Payton. Next time I think I'll plan ahead and get some lime to serve with them. I also like a bit more bell pepper and onion, so I will probably use 1 red pepper and 1 green pepper next time, but I just used what I had on hand.

Enjoy!

Friday, May 1, 2009

They Call Me Mellow Yellow...

Is it seriously May already?

Yesterday was a yellow kind of day, but I was anything but mellow! I started the morning making something that was yellow... Can't say what, it's a surprise! I'll be doing a tutorial on it in a couple days. In the morning I realized a had a couple bananas we didn't finish before they went to mush (this is a first around here!) so I decided to make Banana Chocolate Chip Muffins while Payton was taking a nap in the afternoon.

While those were baking I finished this lovely yellow headband:

I had already made the large yellow flower loop bow and the satin flower. Must have been the muffins on my mind that made me decide to throw in a layer of brown gingham and a brown button to finish it off. I love how it came out!

Just look at my "baby fashion" finds from yesterday! Yellow and Brown! I should have been listening to Jack Johnson's "Banana Pancakes" to complete my afternoon! (love that song)

So you want the Banana Chocolate Chip Muffin Recipe, right?

Banana Chocolate Chip Muffins with Streusel Topping

Ingredients
1 cup milk
1/4 cup vegetable oil
1 large egg
2 cups all-purpose flour
1/2 cup brown sugar
2 teaspoons baking powder
1/2 teaspoon salt
1 cup bananas, mashed (about 2 medium very ripe bananas)
Chocolate chips *optional
Streusel Topping *optional
1/4 c all purpose flour
1/4 c packed brown sugar
1/4 teaspoon cinnamon
2 tablespoons firm butter
Streusel Directions: Combine dry ingredients, cut in butter with 2 knives in a criss-cross motion or use a pastry blender until crumbly.

Muffin Directions

Pre-heat oven to 400. Grease bottoms only of 12 medium muffins cups with shortening, spray with cooking spray or line with paper baking cups.

In large bowl, beat milk, oil, egg and bananas with fork or wire whisk until well mixed. Stir in flour, sugar, baking powder and salt all at once just until flour is moistened (batter will be lumpy). Fold in chocolate chips. Divide batter evenly among muffin cups. Top each muffin with 1 tablespoon of streusel topping.

Bake 20 to 25 minutes or until golden brown. If baked in greased pan, let stand for 5 minutes in pan, then remove from pan to wire rack; if baked in paper baking cups, immediately remove from pan to wire rack. Serve warm if desired.

Makes 12 muffins
Enjoy! I recommend a glass of milk to wash one down, or if you are like me and don't like milk, try a diet dr. pepper :) Also *note to self, don't go into food photography. Yikes!


Related Posts with Thumbnails