


You've probably seen the yarn wreaths that have become popular over the last year. Love them... The price tags on some...not so much!
Want to make your own for around $5?

Let's get started!
Here's what you need:
1 Styrofoam wreath- Any size will do...I got mine at Dollar Tree.
Yarn
Fabric scraps, thread/needle, buttons, ribbon, and felt...or pre-made embellishments
Scissors
Hot Glue Gun
Patience :)
*I have to apologize about the funky lighting in the pictures! One of the joys of apartment living, very little lighting!

Start by hot gluing the end of your yarn to whatever side you want to be the "back" of the wreath.
Now start wrapping the yarn around the wreath to your hearts content. I wrapped mine so the yarn was just touching, not overlapping, but you could go crazy and just wrap until it's completely covered (I think I will overlap a bit next time for more depth). At first I was cutting the yarn into long piece making it a bit more manageable to wrap, but I got tired of hot gluing all those end pieces.

I found if you just keep your slack fairly short on the ball of yarn, it makes wrapping easier. Keep yourself sane and do this while watching TV or something.
Keep wrapping until its fully covered and glue your end piece to the back.
If you have pre-made embellishments, the rest is easy, just glue them on and your done! If you want to make your own, here's how I make what I like to call a floppy poppy. Lame name, I know...maybe there's a real name for them, but I'll call it that for now!
Cut 3-5 circles out of scrap fabric in varying sizes. I freehand these, get your smallest circle cut and use it as a guide to cut the rest of the circles larger than the last. Don't obsess over them being perfectly round, trust me, none of mine are!

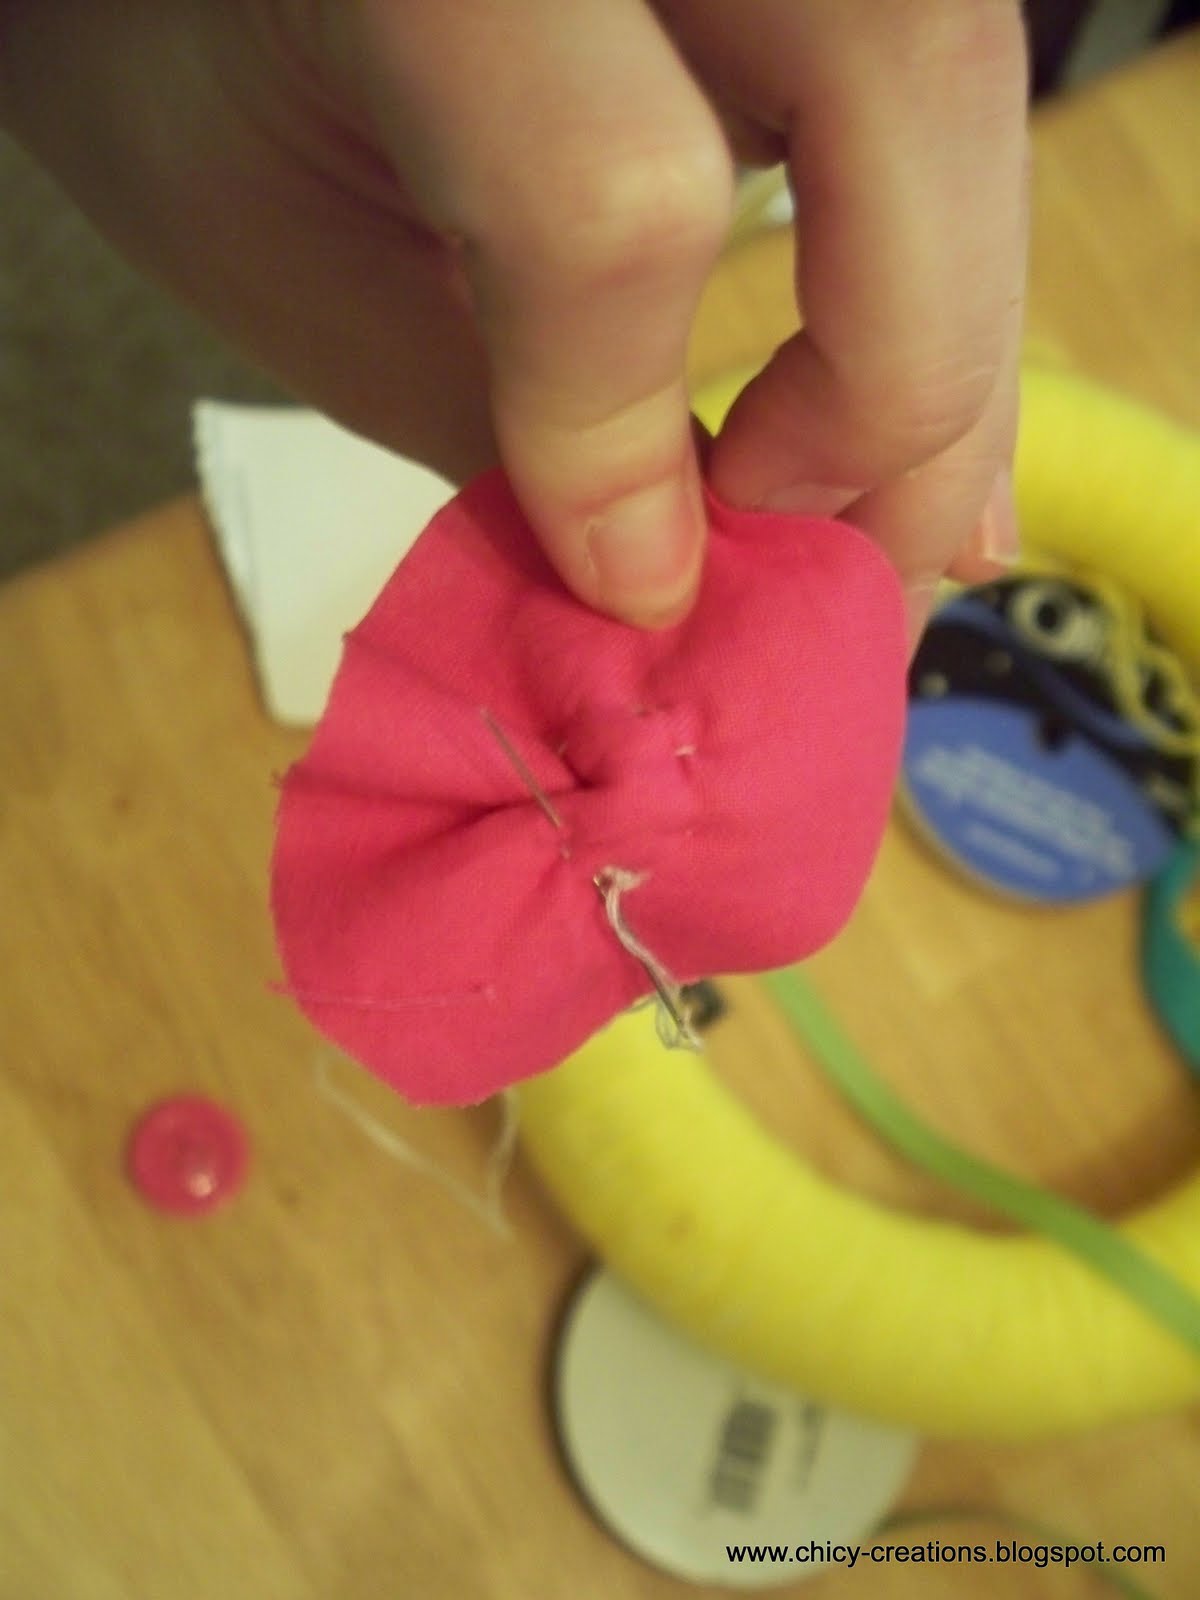
Thread your needle and knot the end. Stack your circles how you want them, then starting from the bottom (underside) of your circles, weave your needle up and down, bunching the fabric on the needle, and slightly turning the circle as you do this. Did that make any sense? I hope so.

When your needle is covered, pull it through and slightly tug until the fabric gathers.

Continue sewing like this until you've sewn a circle in the center. Make sure you pull the thread tightly, the tighter you tug the more gathered and "floppy" your flower will be. Your final stitch should end on the bottom, and then knot off your thread.

To finish my "poppy" I sewed a button in the center. I wanted my flowers to have a frayed look, so I took the edges and rubbed them fairly hard against the palm of my hand.

Before attaching my flowers, I hot glued some green ribbon to the wreath, to do this I glued the one end to the back, and winded it back and forth on the front, placing dabs of glue where I wanted it to "twist".

Attach your flower, and a ribbon leaf if you want.


Easy, right? If you did one in pink and brown or blue and brown, how cute would that be for a baby shower gift? Maybe attach a couple of those tiny frames in it so they can add pictures of their newborn and the baby's stats! If you want to make one that you can dress up differently for different holidays or seasons, use straight pins or floral pins to attach your embellishments and you can easily mix things up year around.
Happy Crafting!

Now go crazy making as many little flowers or embellisments as you want to use to decorate it. Some simple faux flowers would be cute as well! The possibilities are endless!
When I finished the wreath, to make hanging easy, I hot glue a strip of ribbon around the top of the wreath, then I looped another strip of ribbon under that piece of ribbon and tied it into a bow at the top. I put a couple of stitches through the center of the bow so it wouldn't come undone when its hanging.

Easy, right? If you did one in pink and brown or blue and brown, how cute would that be for a baby shower gift? Maybe attach a couple of those tiny frames in it so they can add pictures of their newborn and the baby's stats! If you want to make one that you can dress up differently for different holidays or seasons, use straight pins or floral pins to attach your embellishments and you can easily mix things up year around.
Happy Crafting!


1 People Had to Say...:
that turned out adorable!!
Post a Comment