


I spotted some green glass beads at Walmart a few days ago for just two bucks and had good old St. Patty's day in mind.
Today during the kiddos nap time, I got to work making them into a necklace:

Reminds me of stringed peas.
Good thing I like peas.
:)
If string peas aren't your thing, this will work with any small beads.
The pack I used had 126 beads, in two sizes.
Here's what you need:

{and a needle!}
For this necklace, I cut two 18" pieces of ribbon and two 5" pieces of ribbon.
{you can normally get ribbon on sale at Hobby Lobby for cheap}
Heat seal all ribbon ends by running them close along a flame..not in, but close.
This pack of beads were all threaded together on one long strand, already arranged in a pattern, which was perfect for me.
Keep them threaded and this will be a super easy necklace to make.
You'll be re-using the same thread it came on.
If yours didn't come on a strand, you can thread them yourself and go from there.

I doubled up the strand, evening out the beads until I got two tiers I liked.
It's kind of hard to see, but at the top, the thread criss-crossed after doubling and evening out the beads.
Am I making any sense?

In case my crystal clear explanation didn't help, check out my mad paint shop skills for the next step:


Now you'll have 2 separate strands of threaded beads, with 4 thread ends.
Now, start with your longer strand of beads, and thread your needle on to one end of the thread they are on.
Be sure you don't let the beads fall off the other end!
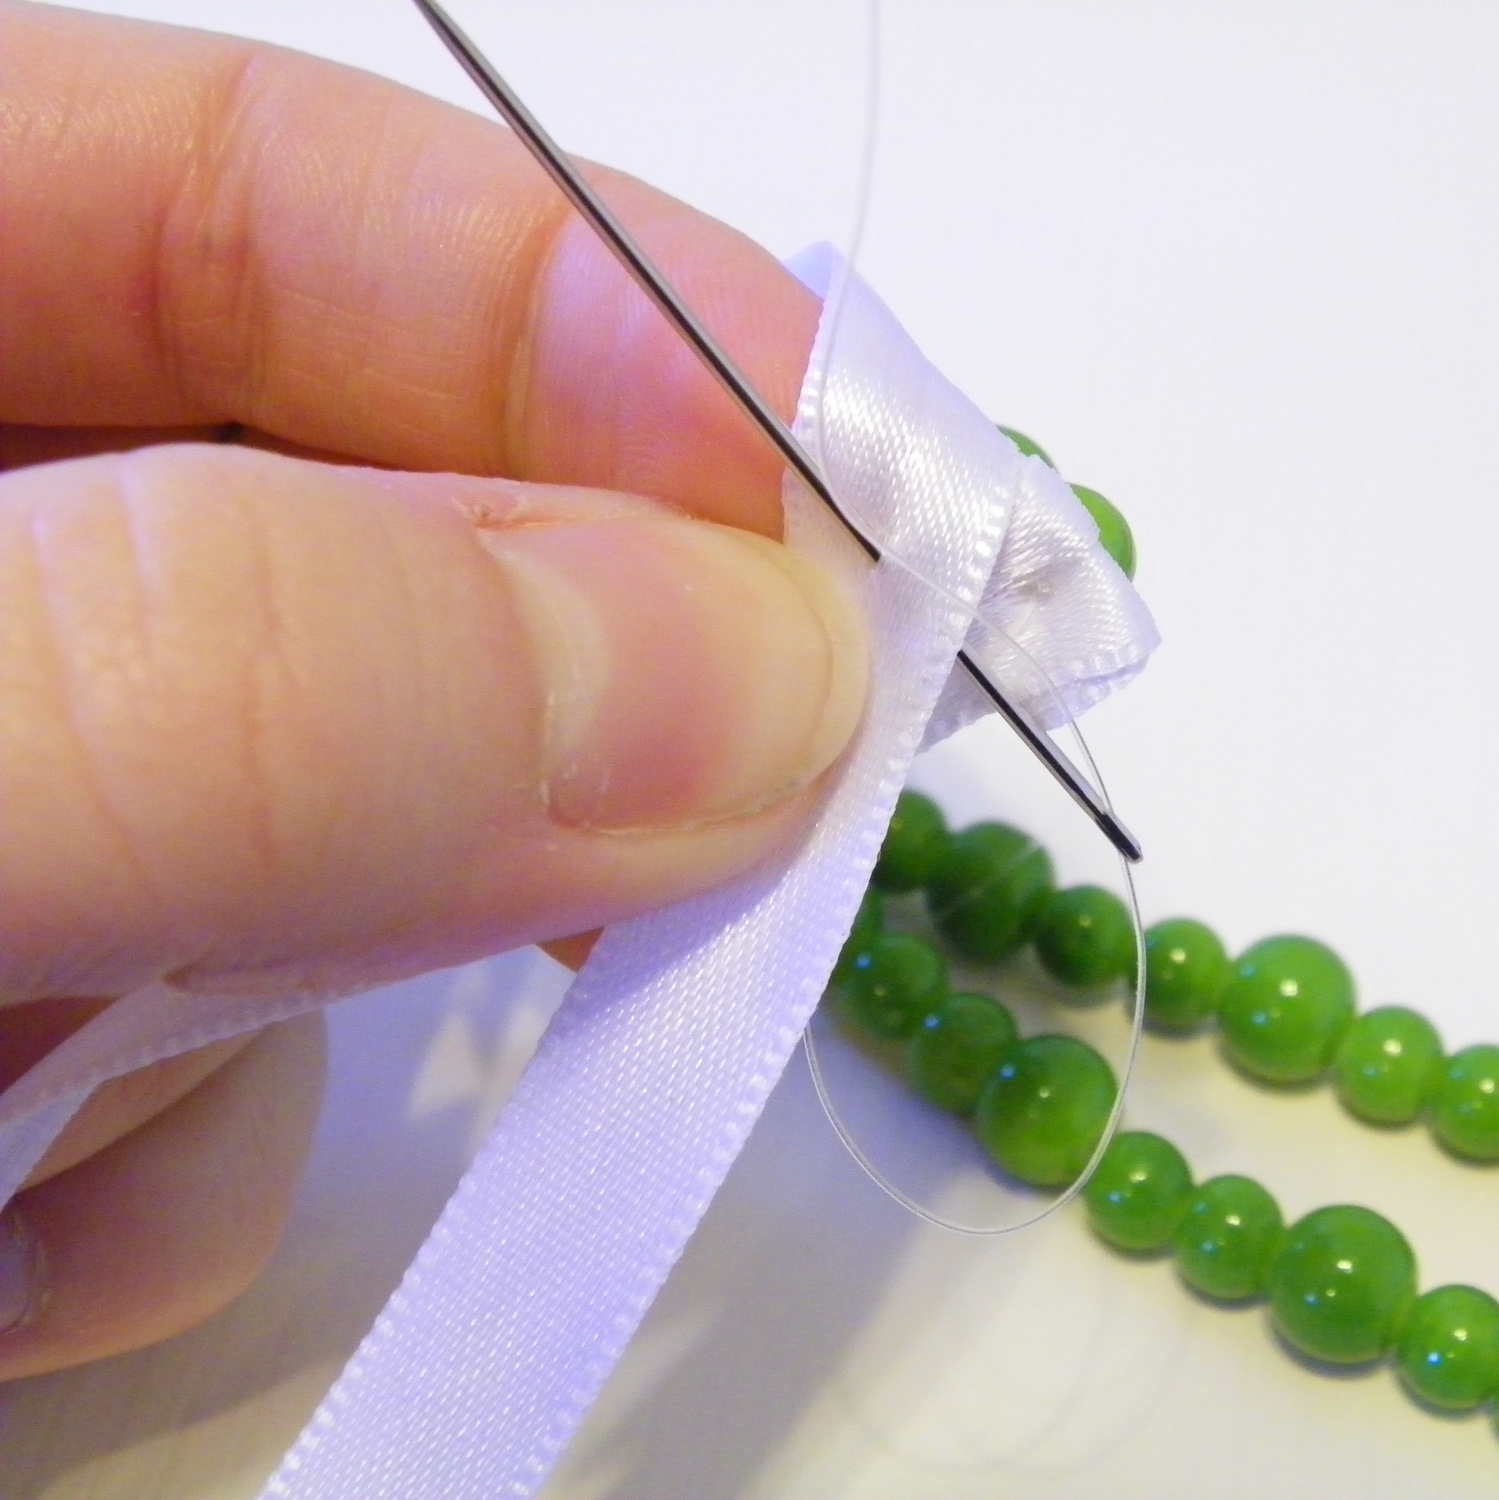
Take one of your 18" lengths of ribbon, fold one end a quarter of an inch, then twice more.
Now with your threaded needle, sew through your folded end. I did a couple stitches and knotted it twice.

{Do not trim any thread ends until we're done!}
Now, do the same with your smaller strand of beads with one of the 5" piece of ribbon, I skipped folding the end, and just sewed about 1/8" in from the end of the ribbon and knotted the ribbon afterwards to cover the sewing.

And for extra security, I stitched a couple more times through the back of the knot:

Repeat on the other ends of the bead strands until all your ribbon is attached.
{18" piece on either side of the longer strand of beads, and 5" piece on either side of the smaller strand.}
Pin your smaller strand of beads to the longer strand:

There's only about an inch of ribbon length drop from the longer strand, to the shorter strand. This may vary on how you divided your beads. If you do a 1" drop, between the strands, you'll have plenty of excess ribbon to work with for the next couple steps.
Now re-thread the needle onto the thread of the "longer" bead strand.
Sew the ribbon from "shorter" strand to the ribbon on the "longer" strand.

Knot your thread a few times, trim any excess of your "shorter" ribbon length and trim the thread on the "longer" ribbon length, then using the ribbon end of the longer ribbon, tie a knot at the base, right next to the beads to cover up your sewing. I did 3 knots stacked because I liked the look.
Repeat on the other side, and your done.

I added a little bow on one side and it simply ties in a bow and the back of my neck.
Make sense?
Somehow, if there are more than 4 pictures, it's 10 times harder for me to explain.
Feel free to shot any questions my way!
Linking up to:


7 People Had to Say...:
Great tutorial, so cute! I haven't tried the jewelry thing yet, maybe it's time for something new. :) Thanks for stopping by at The Little Birdie! I'm following YOU now! :)
Super cute! I love ribbon necklaces
PS: Today is the last day to enter my first ever giveaway on my blog, and I'd love if you'd stop by and enter! Check it out: http://mygirlishwhims.blogspot.com/2011/02/my-first-giveaway-and-introducing-your.html
Very cute necklace! Looks like fun!
very neat and easy idea, thanks for sharing
I love it! Great job with the tutorial. I need to try this:)
So simple and pretty! Perfect for spring...love the colour too! Visiting from www.icantstopcrafting.blogspot.com
That is so cute! I love the green and the ribbon with it:) Great for St. Patty's day. Thanks for sharing the tutorial!!
Post a Comment